[ad_1]
This page was last updated August 3rd 2021
ItThis is what it looks like Guide to Ascent Building, I’m going to show you my Critical Commando Rifle BuildThe aforementioned uses Burst Rifles to do massive amounts of critical harm. I’ll share the Skills and Attributes you should focus on, the Augmentations you’ll pair with these, and the Tactical Gear, Weapons and Armor that work well for this BuildThis is. If you’ve been looking for a way to annihilate enemies from a distance while being agile in order to dodge attacks, then this guide is for you.
Critical Commando Weapon Build by The Ascent
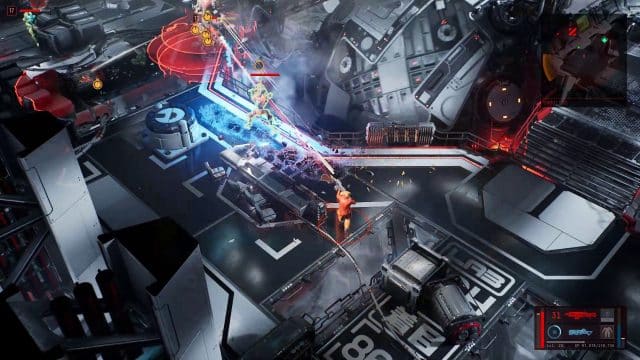
The Critical Commando Rifle BuildBecause of its Burst Rifle Proficiency, it is able to deal great critical damage quickly. Unlike the Shotgun Slammer Build, you’ll want to be patient in shooting enemies from behind covers and from a distance due to your comparatively lower HP. This shouldn’t be an issue given your quick evasive movements that protects you from the majority of incoming attacks.
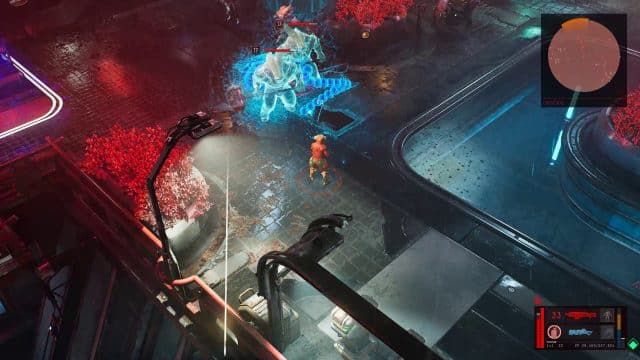
Your Mono Ranger Augmentation, you’re able to deploy a monobot who is equally as adept at using a Rifle to quell the growing number of enemies coming at you. You can also use the with Joyrun DragonTo inflict statism on multiple targets, summon a Dragon. As long as they are not stopped, this makes them more vulnerable to being destroyed. You can also eliminate nearby enemies by doing so, and you have the additional time needed to hide behind cover.
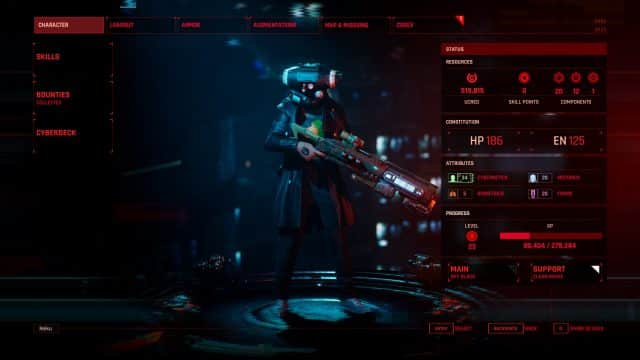
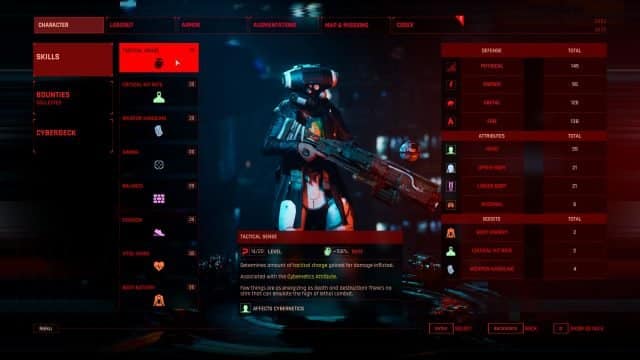
Critical Commando rifle | Character Creation (Skills and Attributes)
You can use 3 Skill Points to level up. SkillsChoose the skill you want. You can earn additional Skill points by exploring. Additionally, Skill Influences Attributes are what determine your effectiveness. AugmentationsYou may also have special skills. Among the 8 Skills in The Ascent you’d want to focus on Weapon Handling, Critical Hit RateAnd EvasionThe best.
At lower levels, you’ll have to manage the points you’ll be investing in each of these Skills as it differs every now and then based on your needs. For instance, I’d prefer to start out with Weapon Handling at around 5 to 10 points, followed by Critical Hit Rate, and then Evasion but the order can change depending on the type of enemies I’m facing.
If you’re up against the Turbo Keesh who lunges next to you, you’ll focus on improving Evasion so you can quickly dodge their attacks. On the other hand, if it’s a simple FeralIf they deal Melee Damage, then increasing Critical Hit Rate will easily eliminate them.

Let’s start with Weapon Handling. This Skill lets you reload and switch. WeaponsYou can do it at lightning speed with little waiting time. It works towards your advantage since you’ll want to reload your Burst Rifle in a millisecond to improve the speed at which you shoot.
Weapon Handling works really well with Critical Hit Rate and Burst Rifles because while you’re gunning down enemies in quick succession, you also inflict massive critical damage in the process. You aim to eliminate them, destroying their weak points and denying them any chance to respond to your shots.
Lastly, there’s Evasion, which drastically lowers the Skill’s cooldown period. You can dodge enemies’ attacks by using agility. Evasion is best coupled with crouching behind covers, which you’ll mostly be doing with this BuildYou can do it. Since your HP isn’t that high, you’ll want to remain nimble and safe while shooting over the cover you’re hiding from. This allows you to stay safe even as your enemies are killed in front of you.

Overall, it’s best to maximize points at 20 for Weapon Handling, Critical Hit Rate, and Evasion to ensure that you fully gain the benefits of what this Build has to offer. For spare points, you’ll want to boost Tactical SenseBetween 10 and 15. It increases your chances of getting a job. Tactical Gear’sYou damage your enemies and determine the rate at which you charge it.
Higher numbers mean you are able to deploy drones and grenades more often. Additionally, it’s worth investing points into Vital SignsTo increase your maximum HP. To keep your life going, you need at least five. Cybernetics should make up the majority of your Attributes. Motorics, Frame and Biometrics are next.
Augmentations, and Modules| AugmentationsAnd Modules
Augmentations
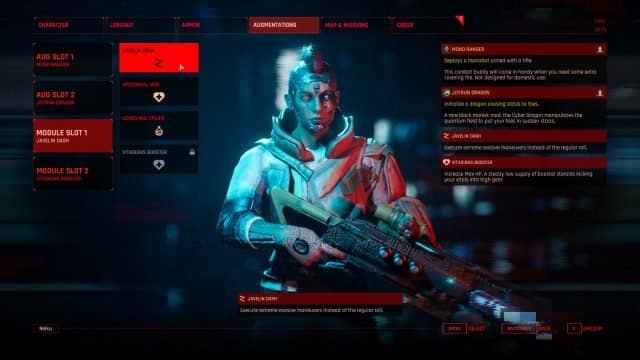
When it comes to special abilities, you’ll want to focus on Augmentations that utilize and considerably develop the performance of your Cybernetics Attribute, while taking your Build’s critical damage and mid-range playstyle into account. As such, it’s best to obtain the Mono Ranger and Joyrun DragonAugmentations
Mono Ranger allows the summoning of a monobot for assistance in fighting. Monobots use a Rifle to rip apart enemies. What’s more is your high Cybernetics Attribute directly influences its damage so you both end up eliminating targets more effectively. Mono Ranger is perfectly suitable for risky situations when there are too many foes and there aren’t that many covers to hide behind. As such, you’ll have the space to search for and to rush from one area to the next while panicking less.
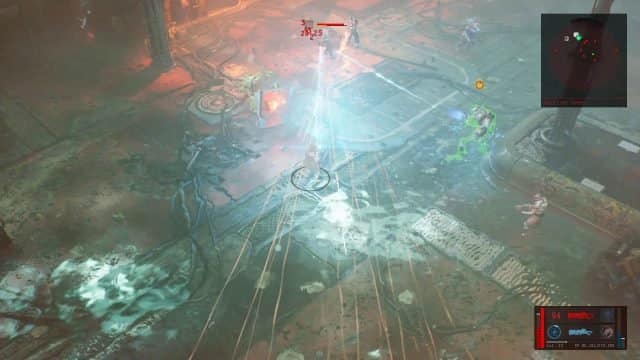
Joyrun Dragon on the contrary is an Augmentation that allows you to again deploy a creature. Now it’s a Dragon. The Dragon then attacks enemies to cause stasis. As a result, they’re stunned in place for quite a while, giving you time to shoot them. The best thing you can do to get them is to draw other enemies near to them before dealing as much damage as possible, indicated by the green bars over their heads.
Once it reaches this point, affected enemies will explode while those who’re nearby will take the same damage. Similar to the above, your Cybernetics increases in number, resulting in more targets being affected by stasis.
Just remember to summon the dragon when you’re facing enemies as they won’t get affected otherwise. There are many Augmentations which unleash an explosion of homing weapons, but they’re far less powerful than other ones. Homing Mim, Joyrun Dragon will not follow targets until they’re hit so be sure to aim properly.
Modules
Different from Augmentations ModulesThese are designed to improve your passive skills. For this Critical Commando Rifle Build since you’re going to move swiftly to avoid incoming attacks while shooting from a mid-range distance, you’ll have to enhance your Evasion Skill and max HP. Make sure you have the appropriate equipment to do so. Javelin DashAnd Vitasigns Booster Mods
Javelin Dash allows you to move faster and more fluidly, rather than rolling around on the ground in order to avoid attacks. This makes it easier to hit you. Vitasigns Booster boosts your HP and improves your survival rate. You’re going to need this more than the Speedheal ModYou can gain more HP by purchasing health packs.
The reason is the loot that dead enemies leave behind won’t always provide these packs so you’ll continue to end up with less HP. It’s therefore better to have more life to begin with. Who doesn’t want that?
Guide for Weapon Selection: The Ascent Rifle Build Guide| Weapon Selection
Because your loadouts are different, there is the option to choose between two types of Weapons. Combat. Two Burst rifles that cause massive energy and physical damage should suffice for both Primary and Secondary weapons.
Particularly, EBR EnforcerThe, my favourite Weapon, is the best weapon to shoot down your enemies. This is a powerful Weapon that doesn’t require you to aim directly to hit your targets because of its homing bullets, which follows them around on your behalf.
Moreover, this particular functionality is beneficial to you since you won’t be putting points into the Aiming SkillIt stabilizes and increases your ability to aim.
Because it inflicts Energy Damage, which is the best damage you can deal against most enemies such as mechs, bots and thugs, you’re more likely to eliminate them faster together with your critical hits. You can also reload it before your eyes blink by its fast default reload. You can pick it up easily from your enemies at higher levels.
You can also choose another Burst Rifle as your secondary weapon. You can also choose the Burst Rifle. ABR CommanderIt has almost the exact same stats and abilities as the EBR Enforcer. While it deals less damage than the EBR Enforcer, it is still very efficient due to its Physical Damage or homing shots.
Remember, it’s vital to have two Weapons that inflict different damage types since you’ll be switching between either depending on the enemy you face.
Selection of Tactical Gear| Tactical Gear Selection
Tactical Gear is similar to Augmentations. It gives you a unique ability that helps you in battles. Since Tactical Sense is not a top priority, you’ll want to select the Tactical Gear that won’t take too long a time to charge based on the damage you deal. You should aim to have a maximum 700-dollar charge value.
GR8 Fragmost GrenadeBecause it immediately eliminates enemies from large numbers, this Build works well. To make multiple enemies run towards you, just throw the grenade and they will explode.
You can also combine this with the stasis feature of Joyrun Dragons when you’re fighting against stronger sub-bosses like Bounty TargetsYou can use this effect to kill multiple enemies simultaneously. Both effects ensure that you’re able to simultaneously harm and eliminate numerous enemies efficiently.
Gear Selection| Armor Selection
It all comes down to Armor, you’ll be focusing on acquiring the best head, torso and legs Equipment that’ll defend you from Physical, Energy, Digital and Fire Damage. At earlier levels, you’ll mostly encounter enemies like Ferals and Turbo Thugs that deal Physical Damage but as you continue to explore sections of each tier, you’ll have to protect yourself from the remaining damage types as well.
These defenses are not enough. The following gear provides Skill and Attribute boosters that will further increase your Augmentations. So choose carefully.
For your headgear, equip one that’ll give bonuses to your Critical Hit Rate such as the F-50 Sledgehead Helmet. As a result, you’ll increase the chances of successfully dealing critical shots. Your Body Energy will also be boosted by this helmet. Your Body Energy is what determines how much energy you have left, and it’s used to activate special abilities through Augmentations.
You should look for armor that increases your defenses, such as those covering the torso. Runner CoatThis coat is. The coat can be useful in situations where you are unable to hide behind cover due to the number of enemy attacks. It also increases Weapon Handling and allows you to quickly reload or swap weapons.
Finally, the should be worn for your legs. Runner TrousersTo increase your defenses, as well as your Critical Hit Rate and Tactical Sensitivity, and, therefore, your Cybernetics Attribute.
Note that you’ll continue to find better Armor as you complete more and more missions. Purple and gold armor are the rarest and most powerful. With this Build, you’ll always want to constantly improve Cybernetics, which influences the strengths of your Augmentations, while boosting your Evasion or Vital Signs Skills.
Final tips
For weapons to do more damage than armor, they require advanced, superior, and basic components. This is obtained by hunting for loot. You will find their locations on the map. To make your Burst Rifles more combat-ready, visit the Gunsmith.
Swap your GR8 Fringmost Grenade if fighting robots, mechs or turrets. G92 Emp Grenade as it’s more effective. These enemies should be prevented from doing significant Digital Damage. They will be briefly stunned while they inflict Energy Damage.
Finally, additional Skill points can be used to increase your Tactical Sensitivity and enhance your Cybernetics Attribute. In turn, this boosts your monobots’ damage. Your Joyrun Dragon Augmentation also affects more targets. To improve your chances of survival, consider putting at least five points in Vital Signs.
Watch out for future updates Build GuidesCheck out the following: The Ascent WikiIf you have any questions, please contact us! How did this Critical Commando Rifle Build Guide go? Do you want to try a new build? Would you like to see the next guide? Comment below to let us know!
[ad_2]